There's been some buzz around the Mamatography Photo Sharing & Critique group with questions about customizing Lightroom "Presets".

Lightroom is a means for that something.
 Here, you can import your photos from your camera card or hard drive. Then, create dynamic black and white or color enhanced images. Correct "exposure", color balance, sharpening, noise reduction and MORE!
To the left you will see the Presets panel. This is where you will find Adobe's default presets as well as be able to make your own.
Presets are a series of Lightroom settings whose information is stored as a set of color and correction controls. If you are familiar with Adobe Photoshop, you may of heard of the term "Actions". These are also sets of settings which are recorded and then applied to one or a sequence of photos to save time and produce professional effects to your photos.
Note: Actions and Presets are heavily used today. Enter into your photos with a light hand so that your personal style remains intact!
Below you will see that I used a default preset, an Orange Filter, under LR B&W Filter Presets. These offer a wide range of instant, high quality B&W settings to apply to your photos. Sometimes I really like the infrared, sometimes not! The Orange is natural yet produces tons of depth and contrast.
Below those, you'll see the remaining list of default presets. Play with them! But output them sparingly. Not all of them are fit to print or even display on Facebook for that matter.


Okay, let's make our own Presets now! Below is a list of my few personal presets. I usually name them by what ever project I'm working on.
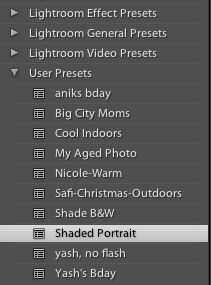 This is because 1 recorded preset from 1 shoot won't necessarily translated to another project due to lighting conditions, color temperatures, and general exposure issues. BUT presets are great to use within the same shoot because you can "batch" apply a preset to a sequence of shot saving TONS of time and effort!
This is really the backbone of why pros use Lightroom, to crunch down time while outputting FABULOUSLY styled images!
Can you see why this would be great for moms too? Never enough time in the day to sit down and look at our pics yet beautify them.
Below is the Presets dialog (located at left in Lightroom). To the right of the box is a plus sign, click it. Note: that you must have a photo selected with adjustment settings (i.e. exposure, color) already made to then "record" a preset.

Next, this box below will appear. Name your presets and if you'd like, chose the photos settings which you would like to be replicated.

Done! You've now created a custom Preset! Now, all you have to do is click on the next pic or Shift, Click on a series of photos, press on your new Preset and VOIL'A, you've got your self a whole shoots worth of professional, corrected images!
Pat your self on the back : )
Happy Shooting, Vicky
No comments:
Post a Comment