Monday, September 17, 2012

Photography Today - Blurring Genres :: Photography Lessons for Moms and Pros with Mamatography

I'm pleased to share an ongoing feature here at the Mamatography blog showcasing up and coming (or just up) Mamatographers.

These women are perfecting their craft as shooters all while playing their most important rolls as mothers. This one's a little racy mamas! 


I knew I wanted to feature South Florida photographer Sarit Lauro this time around after I caught a glance of a few of her recent boudoir shots posted on her Facebook page. 

Sarit is a diverse shooter which brings me to the topic of this post.

Modern photographers are having to be more diverse than ever before in order to stay fresh and competitive.

While many a Mamatographer may establish an interest in newborn, children and family portrait photography out of inspiration from parenting, kids grow up! With that, so do our interests. Motherhood commonly sparks a passion for life, and in some cases, photography of ALL aspects of it.

Personally, Sarit touched my life with her photography and I'd like to take this chance to reflect on my coming of a mother through these pictures.

I met Sarit when I was about 20 weeks pregnant. She was working on her birth photography portfolio and what better ginny pig than a pregnant photographer! 

One of the elements I appreciate the most about Sarit's work is her knowledge of lighting. Especially artificial light. She's really taken the time to understand all the facets, not limiting the quality of her work.

It goes without saying that Sarit gave me what was probably the second greatest gift next to the birth of my daughter, Safi. She captured it.  
Our First Kiss
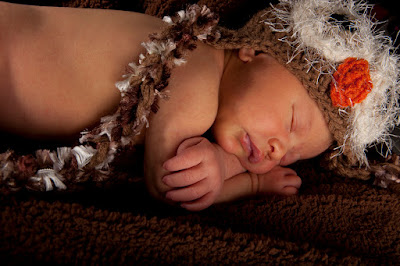


Then, after Safi arrived, she relieved me of the heavy lifting and shot her newborn portraits. It's no secret that in my professional life, I wasn't a newborn photographer. So I was more than glad to leave this up to her!

Now, almost 2 years later, Sarit has transitioned her self as many of us have to and WANT to do.

She launched Boudoir by Sarit in conjuntion with Photography by Sarit but wisely divided her Facebook pages and websites. By doing so, she's able to connect with a vast variety of clientele and yet there isn't a conflict of interest between subject matter.


Use a combinations of light sources for silky smooth skin and overall vibrance in your images.


 Her imagery is tasteful and progressive. Here, Sarit share's some technical notes:


"The camera I use is the Canon 5d Mark II and my favorite lens is a 24-70mm f2.8. 
For my boudoir shoots, I use mainly natural light. I try to position my model by a window and then I fill in the light on the face or other areas of the body that I want to accentuate with my new favorite LED light. 
For children and family portraits I have been bringing my Alien Bees lights with a stand and umbrella. It works great for both indoors and outdoor shooting."
Sarit Lauro is based out of Delray Beach, FL where she lives with her 2 beautiful daughters and husband.

Stay tuned to the Mamatography blog for more on advanced lighting techniques.

Happy Shooting, Vicky


Monday, September 10, 2012

Introduction to Adobe Lightroom and Customizing Presets

There's been some buzz around the Mamatography Photo Sharing & Critique group with questions about customizing Lightroom "Presets".

What is Lightroom you ask? Adobe Lightroom is by my own definition, a photo editing and correcting software. Think of it as a more in depth version of iPhoto or Picasa, YIKES!! Many a Mamatographer are entering the business of photography today. Some are not. No matter your cause, we all need to DO SOMETHING with our photos, no? 


Lightroom is a means for that something.

Here, you can import your photos from your camera card or hard drive. Then, create dynamic black and white or color enhanced images. Correct "exposure", color balance, sharpening, noise reduction and MORE!


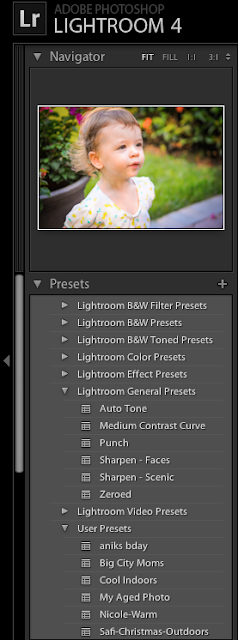
To the left you will see the Presets panel. This is where you will find Adobe's default presets as well as be able to make your own.

Presets are a series of Lightroom settings whose information is stored as a set of color and correction controls. If you are familiar with Adobe Photoshop, you may of heard of the term "Actions". These are also sets of settings which are recorded and then applied to one or a sequence of photos to save time and produce professional effects to your photos.

Note: Actions and Presets are heavily used today. Enter into your photos with a light hand so that your personal style remains intact!

Below you will see that I used a default preset, an Orange Filter, under LR B&W Filter Presets. These offer a wide range of instant, high quality B&W settings to apply to your photos. Sometimes I really like the infrared, sometimes not! The Orange is natural yet produces tons of depth and contrast.

Below those, you'll see the remaining list of default presets. Play with them! But output them sparingly. Not all of them are fit to print or even display on Facebook for that matter.


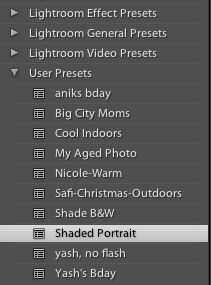
Okay, let's make our own Presets now! Below is a list of my few personal presets. I usually name them by what ever project I'm working on. 


This is because 1 recorded preset from 1 shoot won't necessarily translated to another project due to lighting conditions, color temperatures, and general exposure issues. BUT presets are great to use within the same shoot because you can "batch" apply a preset to a sequence of shot saving TONS of time and effort!

This is really the backbone of why pros use Lightroom, to crunch down time while outputting FABULOUSLY styled images!

Can you see why this would be great for moms too? Never enough time in the day to sit down and look at our pics yet beautify them. 

Below is the Presets dialog (located at left in Lightroom). To the right of the box is a plus sign, click it. Note: that you must have a photo selected with adjustment settings (i.e. exposure, color) already made to then "record" a preset.

 Next, this box below will appear. Name your presets and if you'd like, chose the photos settings which you would like to be replicated.


Done! You've now created a custom Preset! Now, all you have to do is click on the next pic or Shift, Click on a series of photos, press on your new Preset and VOIL'A, you've got your self a whole shoots worth of professional, corrected images!

Pat your self on the back : )

Happy Shooting, Vicky